Accordion section
**An Accordion section allows you to consolidate large amounts of content into categories. Each category has a title and a collapsible panel that shows and hides text and/or links. It is best used for grouping Frequently Asked Questions or resource links together.
Add an Accordion section
- Click on Page from the main menu.
- From your Edit Page screen, select a tab in the navigation bar where you want to add your text section. (If you don’t see a navigation bar below your header, you can add navigation or simply add the section to a single page layout.)
- Hover over the area on the page where you want to add your section. An
 Add Section marker will appear, showing you where a new section can be inserted.
 - Click Add Section to open a dropdown menu.
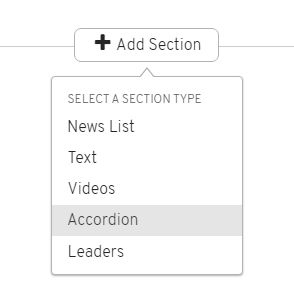
- Select Accordion in the menu.
- In the Accordion lightbox editor, you can customize several options.
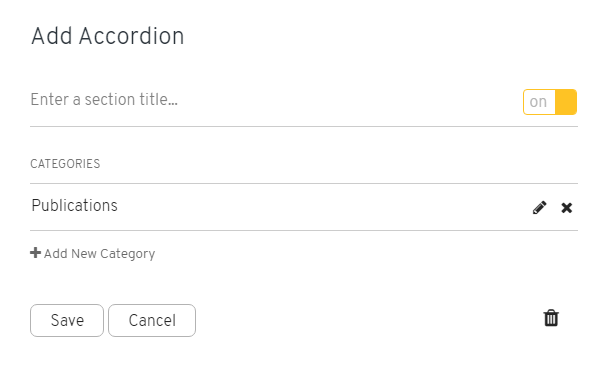
- Add an optional title for the section. If this field is left blank, then no title will appear above the section. Add a Category
- Add a category title and body text that will be collapsed. See Add a new category below for more details. Customize Existing Categories
- You can edit, reorder or remove any existing category. Continue reading below for more details on each of these customization options.
- Once you’ve finished setting up your section, click Add to close the lightbox. The new section will appear on your Page.
Section Title
Add a new category
- Click on Add New Category located below your existing categories. The Add a New Category panel will slide into view.
- Enter your category title. This title will always be visible on your accordion.
- To add your collapsible body text, click Enter text here… and begin typing. Press Enter to create a new paragraph. By default, this text will be hidden on your accordion. When a visitor clicks on your category title, a panel will expand to display the text.
- To format, use your mouse to highlight text. Then, use the icons in the WYSIWYG Text Toolbar to create headers, lists, links and bold/italics. To learn about the text toolbar and your formatting options, visit Formatting Text.
- When you’re ready, click Add Category to close the panel and return to your list of categories.
- You can continue to add more categories, or choose to edit, reorder or remove the existing categories.
- Click Save to close the lightbox. Changes to your section will appear on your Page.
Edit an existing category
- Click the
 located on the far right of the categories that you would like to edit. The Edit Category panel will slide into view.
 - Edit your category title or body text.
- Click Save to close the panel and return to your list of categories.
- You can continue to add more categories, or choose to edit, reorder or remove the existing categories.
- Click Save to close the lightbox. Changes to your section will appear on your Page.
Reorder your categories
- Hover over the category you want to move. Your cursor will turn into a crosshair.
- Click and drag the category title to reorder.
- Release the category title when it’s in the desired position. You’ll see the titles reorder on your Page, as well.
- Once you’ve finished editing, click Save to close the lightbox.
Remove an existing category
- Click the
 located to the far right of the category that you would like to remove.
 - Click Delete from the confirmation dialog box to permanently remove the category and all content within it.
- Click Save to close the lightbox. At this point, your category cannot be recovered.
NOTE: You can recover your category by clicking Cancel on the Accordion lightbox. Your changes will be reverted and the deleted category will reappear on your Page. It is not possible to recover your category once you click Save on the Accordion lightbox. You will have to manually re-enter all of the information.
Sample