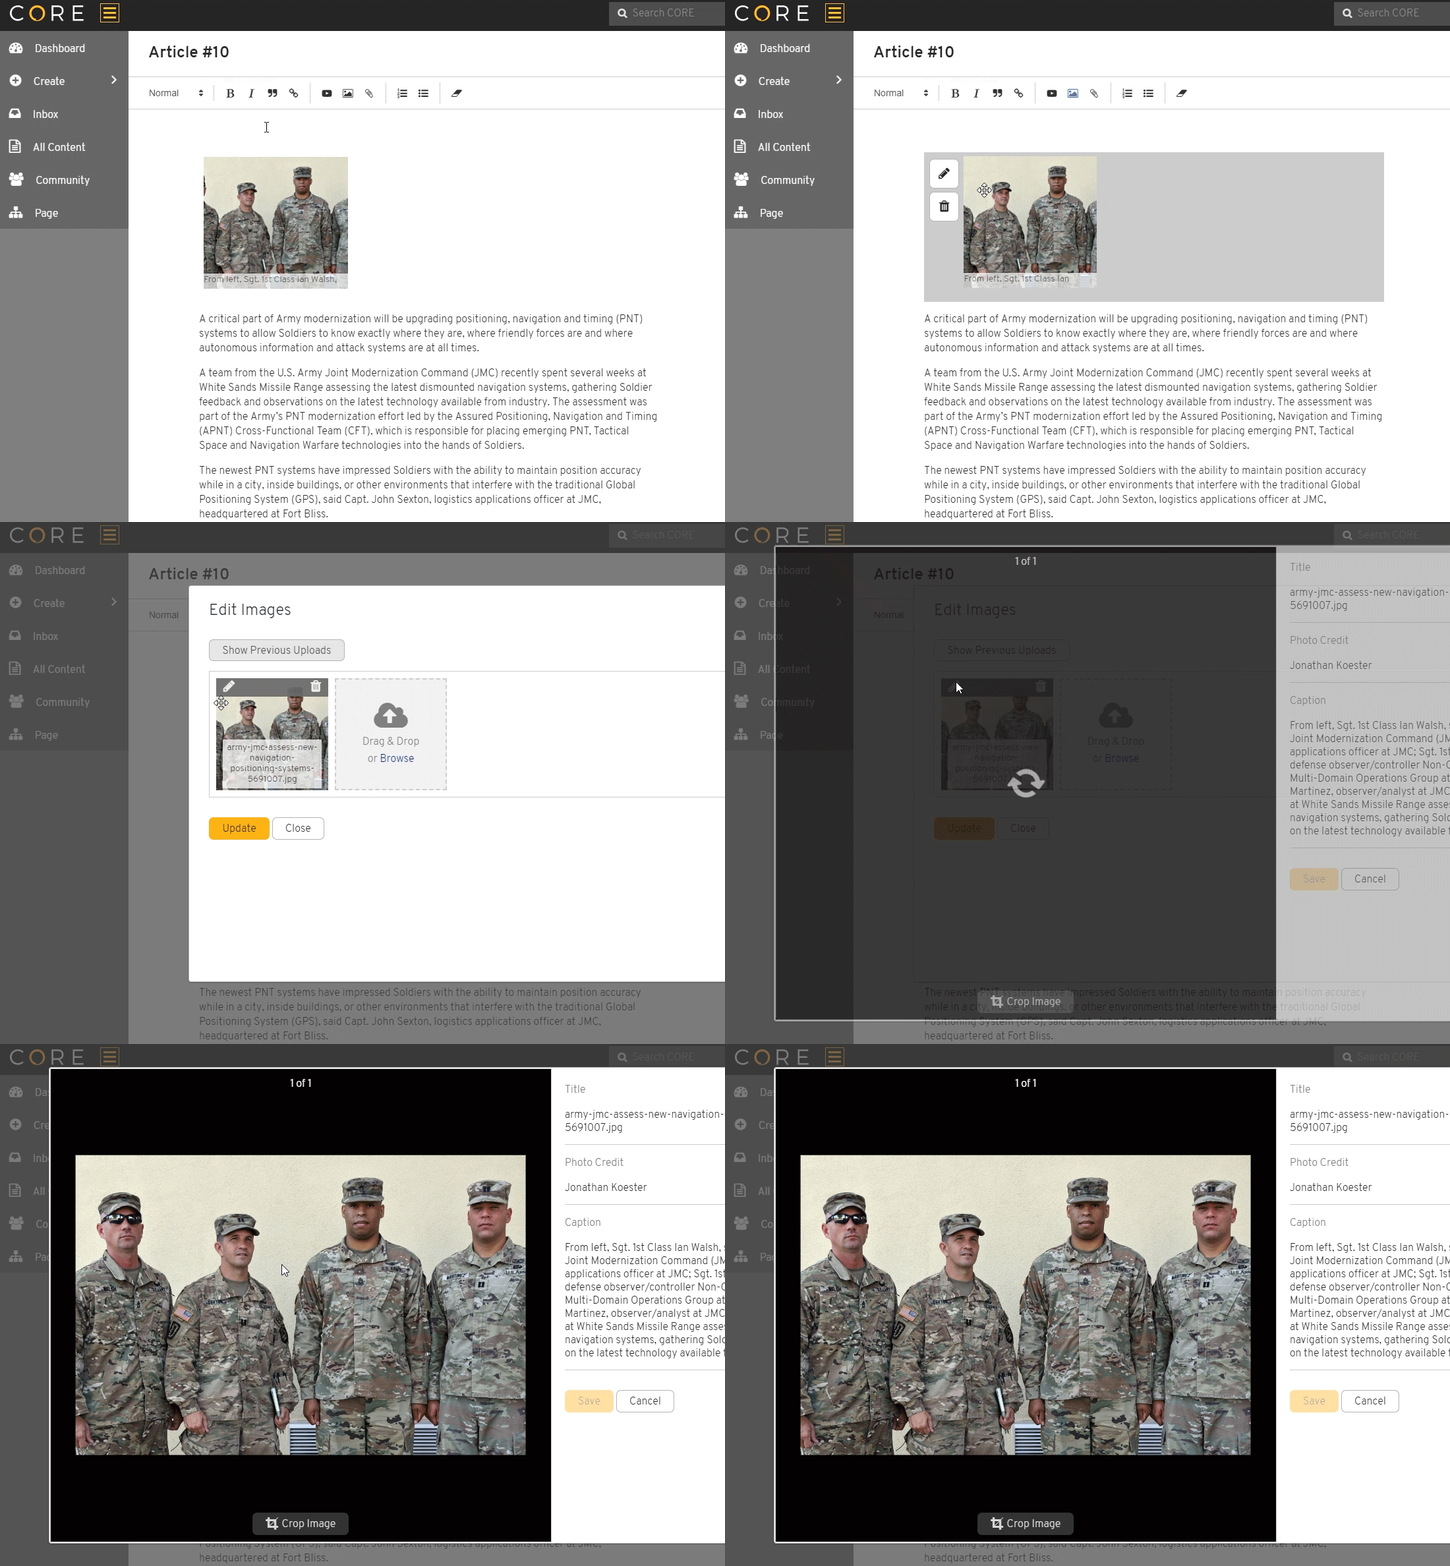
Edit Images
**CORE features a built-in Image Editor for making changes to images you upload. This tool allows you to crop, as well as modify image details, such as captions and photo credits.
Access the Image Editor
To access the Image Editor:
- From your article, click on the image you want to edit. A toolbar will appear to the left side of your selected image collection.
- Click the
in the toolbar to open the Edit Images lightbox.
- From the lightbox, click
on the image that you want to edit.

The Image Editor will open with your selected image on the left and image details on the right. You can crop and edit image details for any image in your article without leaving the Image Editor. Simply navigate to other images by using the left and right arrows.
Crop an image
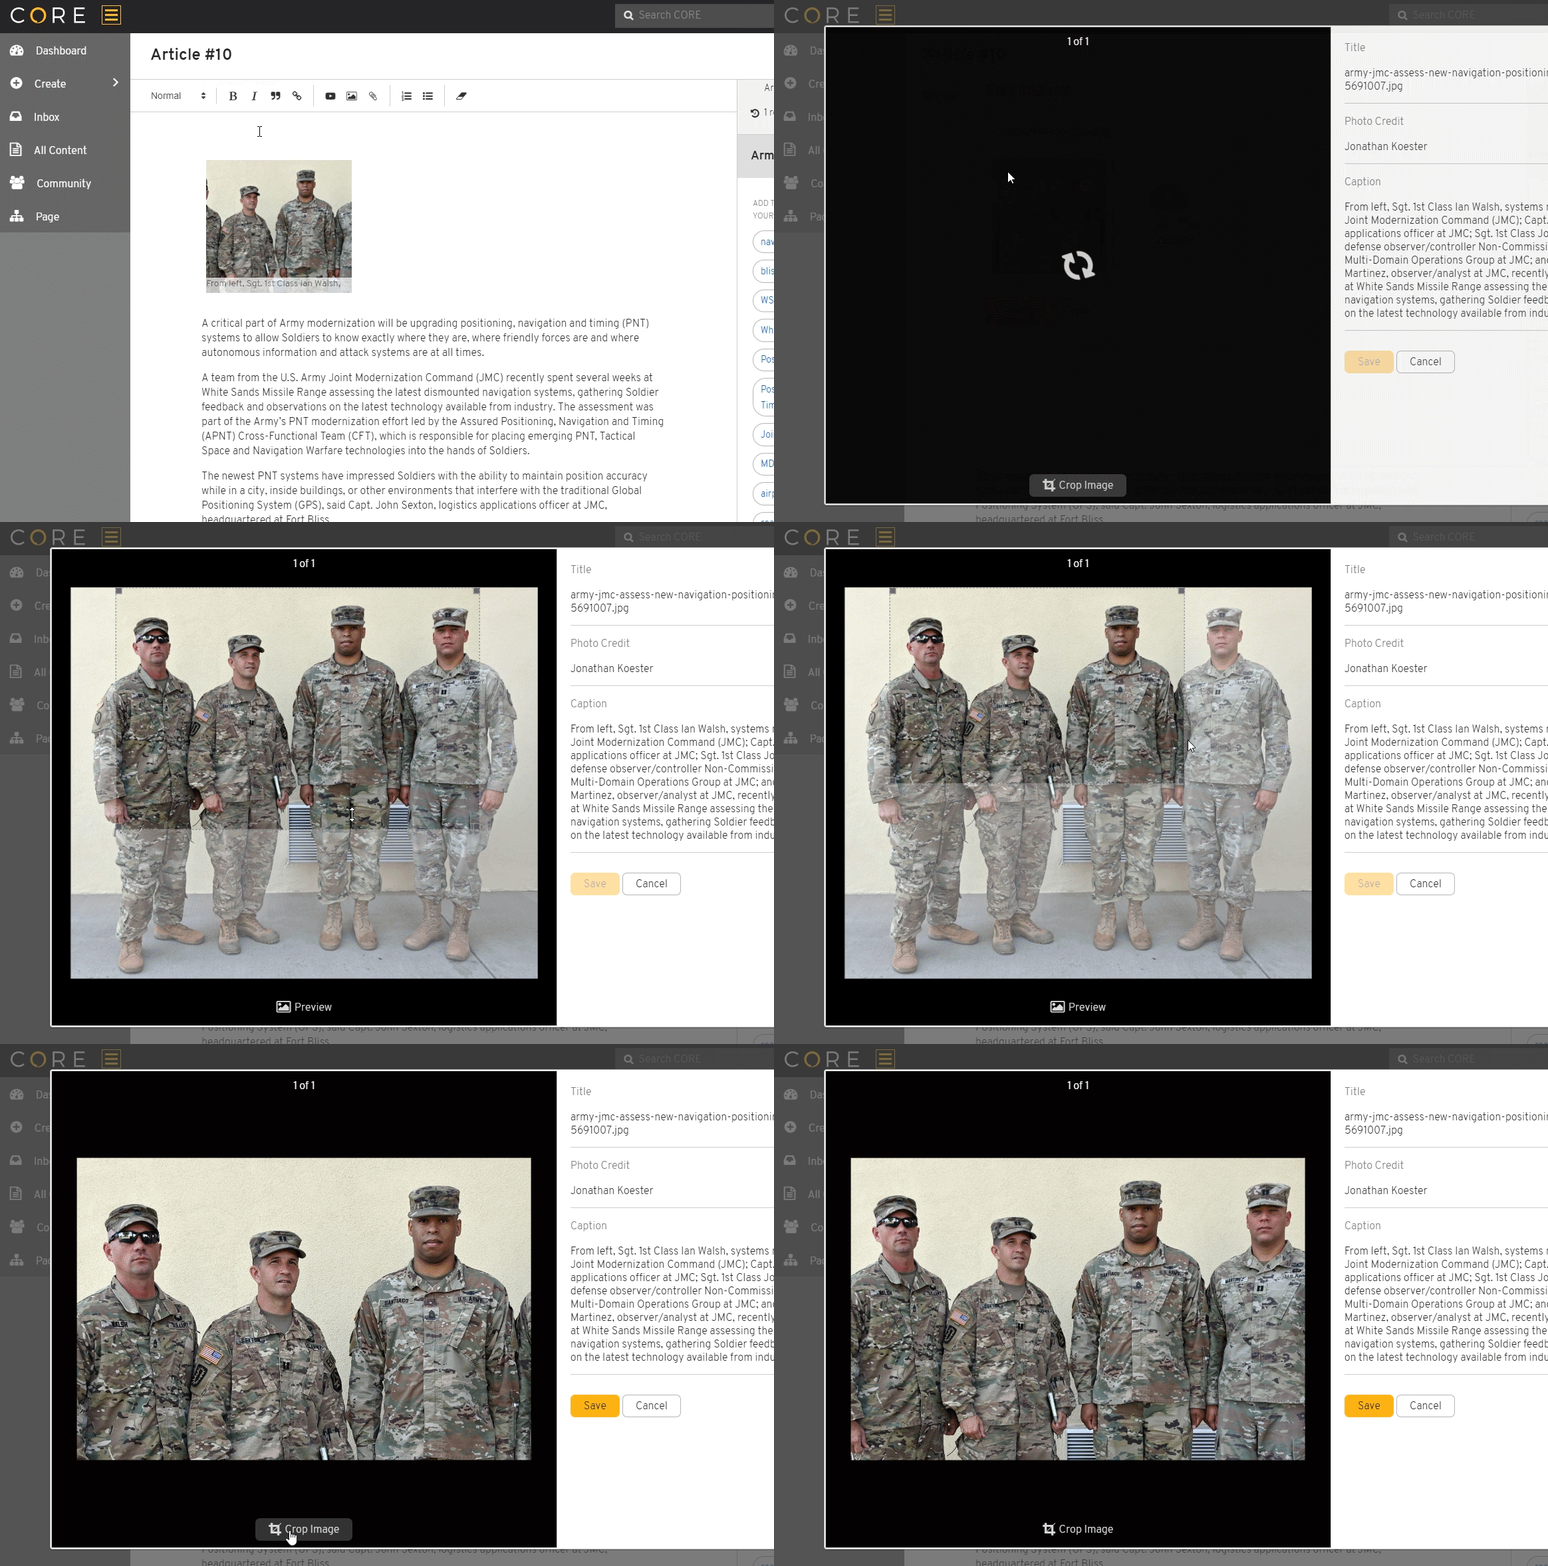
CORE automatically crops and resizes your images to create multiple versions for display on different device sizes. You can manually adjust the crop to remove an unwanted portion of an image or to set a new focal point.
To crop an image:
- Open the image you want to crop in the Image Editor.
- Click
Crop Image located underneath of the image.
- Drag the corner handles to specify new crop boundaries. You can also click and drag the cropping overlay to select the area you want.
- Click
Undo to reverse your last action, if needed.
- Click
Preview to apply the crop.
- You can restore the image to its original size or crop the image again.
- Once your image looks exactly as you want, click Save to close the Image Editor.

Revert changes to an image
CORE maintains an unedited version of your original image, so you can revert changes using the Image Editor at any time.
Simply click 
 Restore Original button is only available if you have made a change to the image. Otherwise, you will only see an option to crop the image.
Edit image details
On the right side of the Image Editor, you'll notice a number of options to edit image information.
If nothing is entered in the ‘Title’ field, then no tooltip will appear on the image.
The caption also serves as alt text that tells search engines what the image is about. This makes your image more likely to show up in image searches. Alt text also plays an important role in increasing accessibility for sight impaired users, screen readers, and browsers that block images.