The Combined Arms Rehearsal (CAR) ensures synchronization of assets and units in time, space, and purpose to enable the commander’s intent. Additionally, it ensures all commanders and staff officers understand the details of the operation and their responsibility within it. 11th Armored Cavalry Regiment conducts in excess of 24 CARs per year and has found that the CAR is the most important aspect of the planning and preparation cycles for a given operation. Given a short planning horizon, the Regiment, represented by the Brigade Tactical Group (BTG), will focus on the CAR to mitigate effects of incomplete or rushed orders. Regardless of the timeline, the BTG never fails to conduct a CAR in person. While such a short amount of planning is not ideal, the demands of operations sometimes make it so and this shows that a detailed CAR can mitigate many issues with planning. This article lays out the methodology 11th ACR uses to synchronize actions in time, space, and purpose using the CAR. The first half of the article describes the CAR itself with the second half focused on the specifics of the commander’s visualization.
The BTG employs two types of CARs: in contact and out of contact. During pre-deployment preparation, the out of contact CAR brings all hands together on a massive terrain board replete with relief and all graphics. Here, commanders, intelligence officers, fire supporters, specialty platoon leaders, etc. gather and fight out the plan. In contact, the task force uses a reduced method. The commander determines attendees with the minimum being the S2 shop, FSO, S3, and commanders. The rehearsal occurs anywhere that is inconspicuous such as a well-covered wadi, a non-descript building, or even a garage. The terrain board at times is a large map the task force retains or a smaller terrain model with less detail. When done outdoors the task force erects camo nets to minimize overhead observation and disperses vehicles to look non-descript.
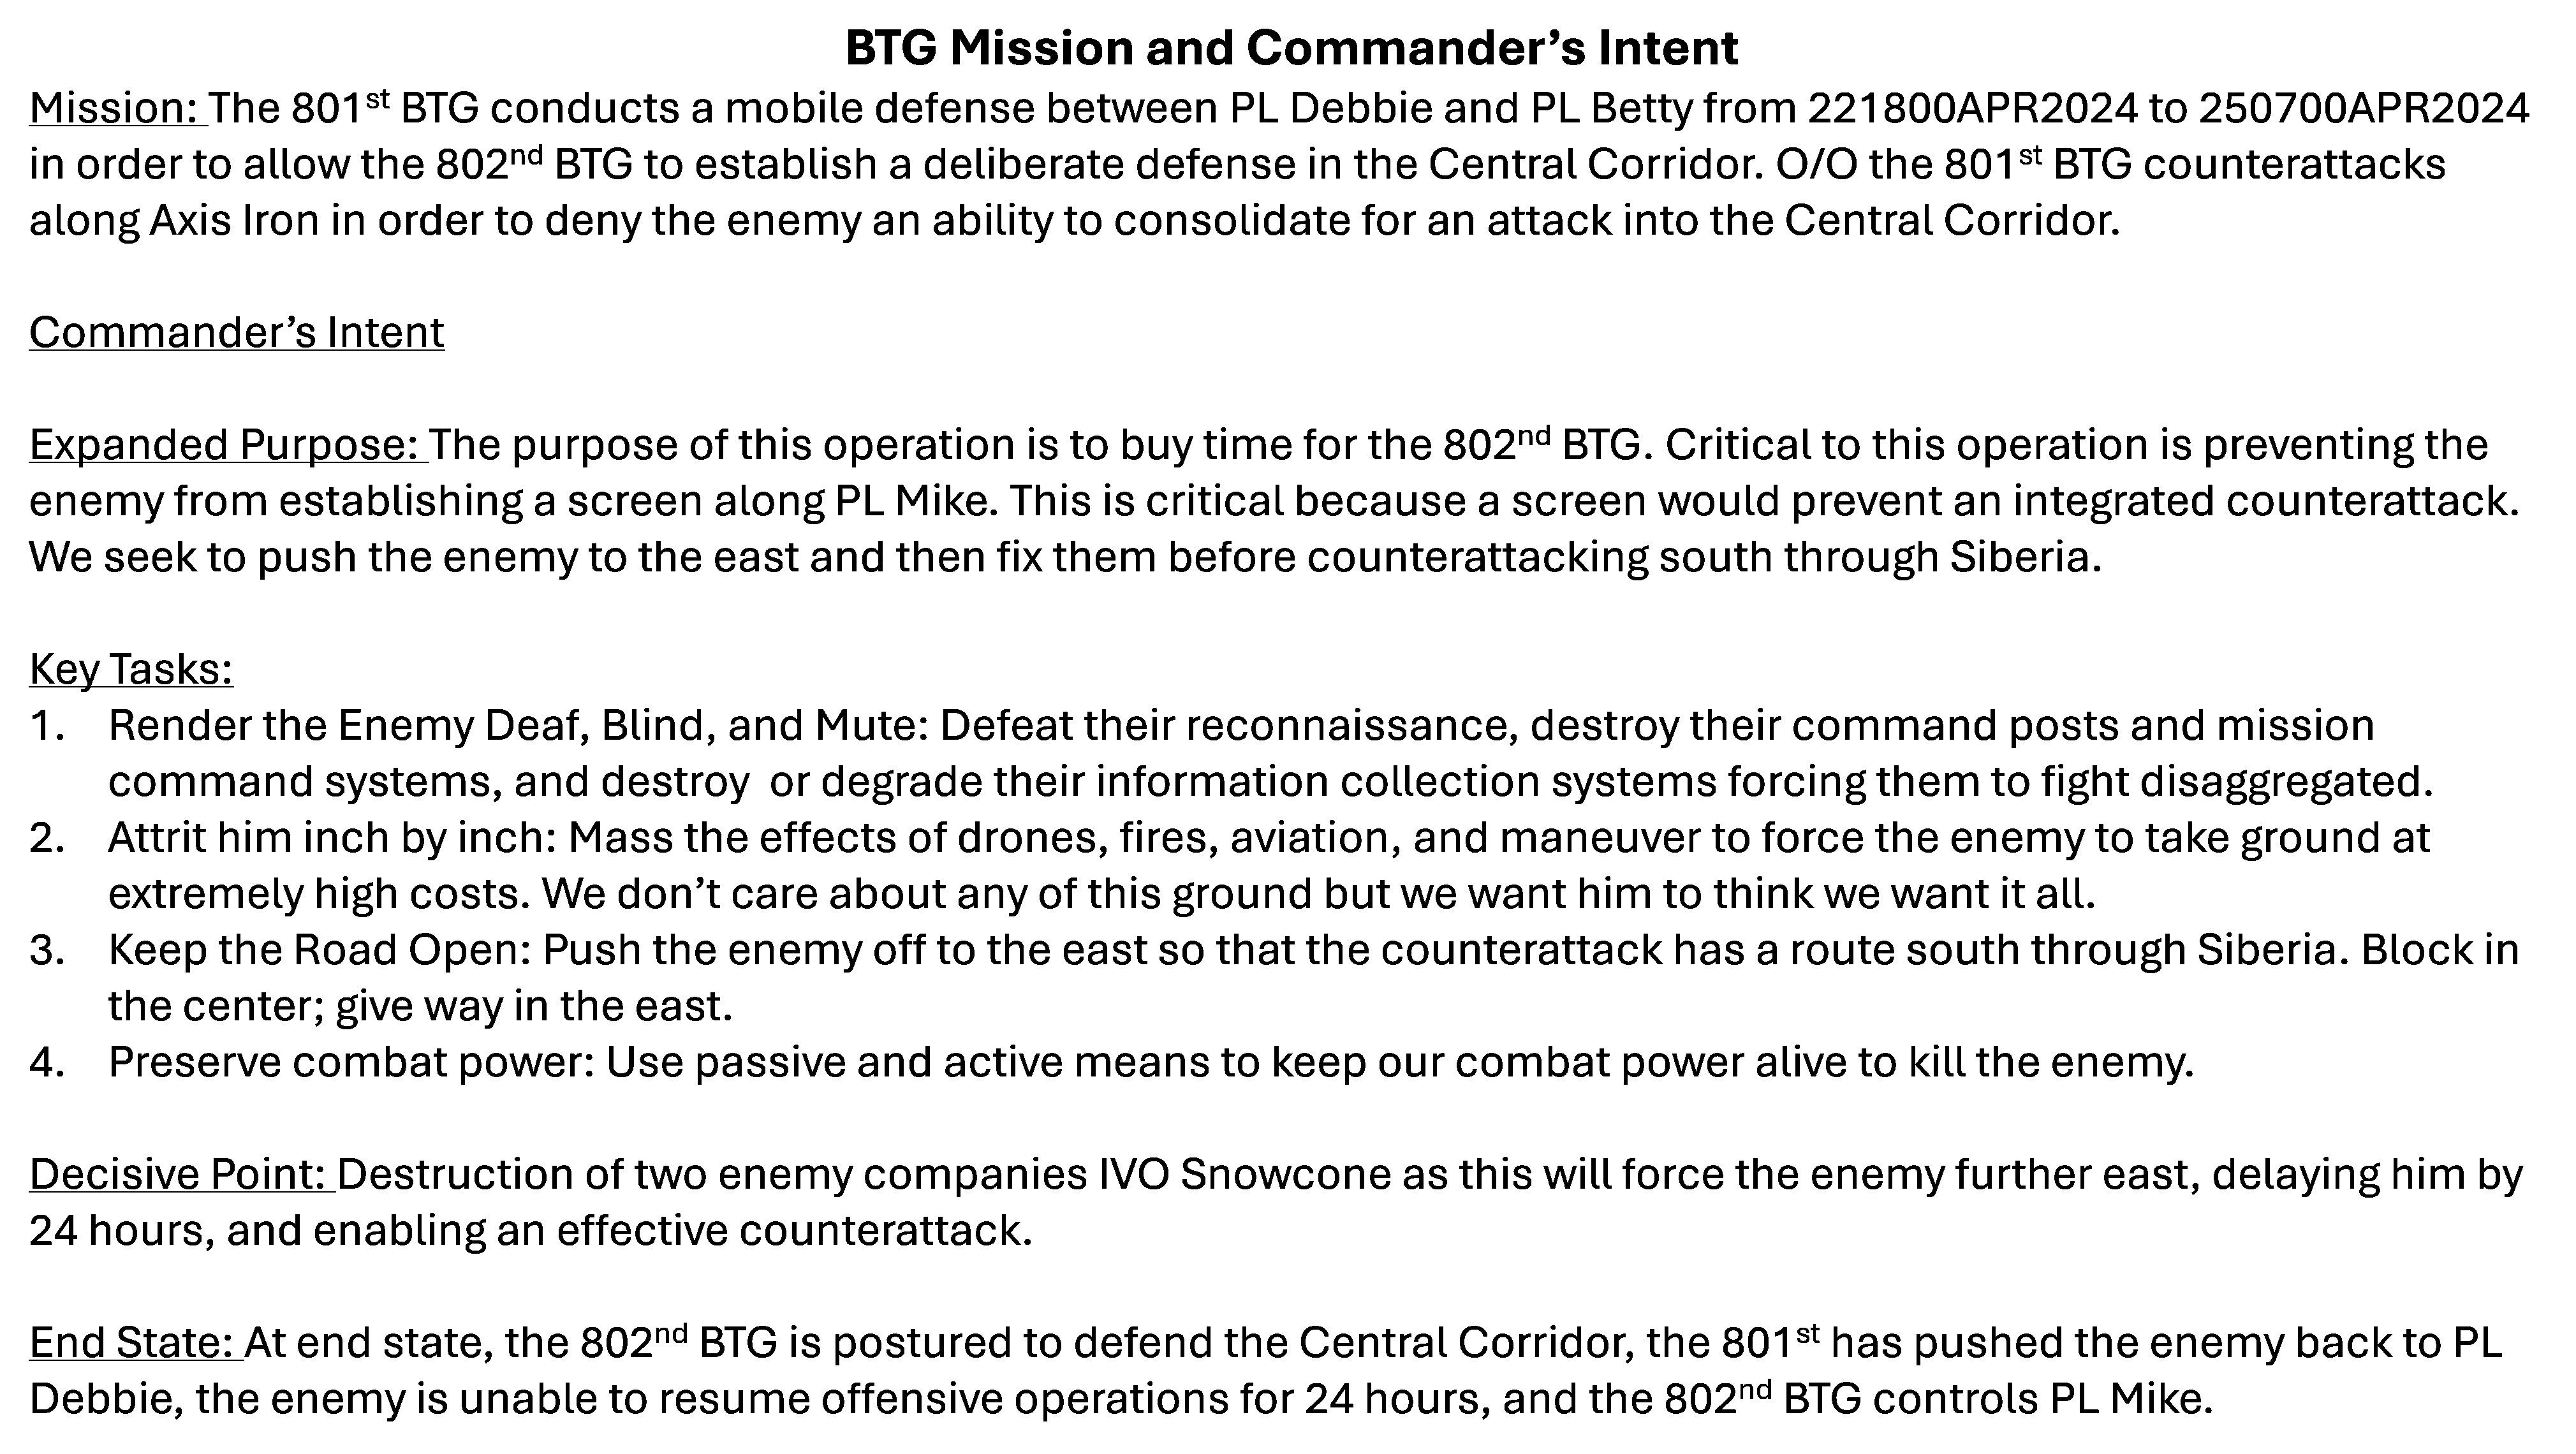
Figure 1. BTG Mission and Commander's Intent (U.S. Army)
The scene setter of the CAR is the Commander’s Visualization. This provides the framework for synchronization in time, space, and purpose. Therefore, we offer the following insight into a good visualization. The commander’s visualization is the commander’s opportunity to ensure everyone sees the fight like he or she does and to ensure the organization is focused on a single purpose. One error many commanders make is in using this space to motivate troops, put out notes, or other miscellanea. The commander should rather focus on translating his or her intent into a well understood overview of operations. This sets the tone for the operation. The format the BTG uses is:
Purpose: This is the expanded purpose of the operation and should closely mirror the operations order unless something has changed from its publication to the order. For example: “The purpose of this operation is to buy time for the 802nd BTG to establish an area defense around Razish to prevent the enemy from seizing the provincial capital.”
What Are We Trying to Accomplish: This can naturally flow from the purpose, but the intent is to talk about the major elements of what the unit must do. “We are trying to delay the enemy advance through a series of engagement areas to slow down his operations and extend his lines. We want to force him east to create a long LOC vulnerable to attack which will set conditions for a counterattack and buy more time for follow on units to prepare their defenses.”
Key Tasks: These are likely similar to your operations order. Some commanders prefer very specific key tasks (i.e. “Seize OBJ Colts”) while others prefer more broad key tasks (“Win the Counter Recon Fight”). We’ve found in the BTG that using pithy phrases that are easy to remember helps ensure compliance and we tend to use more generalized key tasks. For example:
“Key Task #1: Render the Enemy Deaf, Blind, and Mute – Prevent the enemy from seeing or talking. Kill the recon assets and missions command systems. Key Task #2: Attrit Inch by Inch – Make the enemy pay a high price for the terrain he gets. Key Task #3: Grab Him By the Belt: Get in close to neutralize the effect of air and artillery assets. Key Task #4: Deceive Him – Make it so the enemy doesn’t know where our counterattack is coming from.”
End State: This is not different from the typical end state of any operations, laid out in Terrain, Enemy, Friendly, and Civilian considerations.
“At end state, the enemy will have lost two battalions worth of combat power, friendly forces are prepared to defend West of PL Mike, the BTG retains Hill 760…”
Risk: The Army defines risk in terms of accident and tactical, more colloquially termed risk to force and risk to mission. However one defines it, it is important to spell out risk and mitigation measures. One way to consider risk is the Move-Strike-Protect framework. At all times, a unit can normally only do two well. For example, a defense requires loss of ability to move at scale.
“I see three areas of risk: 1. We are in Strike-Protect mode, so we are limited in mobility. We will employ a capable reserve, rehearsed, to return to offense and ensure we protect our flanks from Infantry. 2. We have limited ability to construct obstacles due to limited engineer assets. We will focus on survivability and use terrain and indirect fires to shape the enemy into our engagement areas. 3. We accept risk to our personnel due to the extremely dusty conditions. We will implement a 100-meter dust interval, enforce cleaning of windshields, and provide more time for movements to ensure no loss of personnel to accidents.”
Overview: Here, the commander should walk the terrain on the model or map and discuss how he or she sees the battle unfolding. “I believe the enemy will attempt a simultaneous push toward Siberia and Red Lake Pass. At 2100, troops will move north of the Whale Gap and probe our engagement area. 3-67 AR will push north into Siberia attempting to first seize the John Wayne Foothills and establishing a blocking position at the mouth of John Wayne Passes. Simultaneous to that, 3-15 IN will push toward Nabran and isolate it before clearing it. 2-69 AR with engineers will then pass 3-15 IN and attempt to seize Red Lake Pass using dismounts to clear the high ground to the east and west. 3-67 AR will push to the Siberian Ridge Line and establish a hasty defense. 2-69 AR will then push through a seize FOB Miami as a far side objective. After consolidation and reorganization, 2-69 AR will move to seize Snow Cone while 6-8 CAV attempts to push a screen line along PL Mike from PL Betty to PL Courtney. 3-15 IN will then isolate Barisu and attempt to seize the town from the north. In order to prevent this, we will use a FASCAM to push them into the eastern approach. What we need to do to counter this is act like an offensive line in pass blocking. Tiefort is our center and our defense along JW Foothills is our guard. Nothing gets through. Continue to push the enemy east. Our defense along Porta-Potty Wadi is our Tackle. We’re going to absorb the blow and push the attacking defensive end outside to provide time for our quarterback to throw. As we string them outside along a long LOC, we’ll fix with a counterattack and then send our reserve deep to destroy his PAAs.”
Once the commander provides his or her visualization, participants fight out the plan in real time and that fires and maneuver are synchronized with all assets supporting the plan. Generally, anything already covered in an order, confirmation brief, or back brief, is not covered again save the disposition and composition of forces to set the scene. Commanders do not brief, but rather fight their plans in concert with the BTG shaping operation. The S2 fights the enemy plan as if he or she were the commander. In the offense, the BTG initiates action during the CAR. In the defense, the S2, acting as the enemy, initiates action. For example, when briefing an enemy battalion, an S2 rep might say: “My name is LTC John Jones, and I am the commander of 1-17 IN. I bring to the fight three infantry companies, a scout platoon, and a mortar platoon. I will LD at 0600 and attempt to establish a foothold on John Wayne Foothills using A Company to clear the high ground to the west, C Company to establish a support by fire, and B Company to seize the objective.”
As this action takes place brigade- and battalion-level assets begin to fight against it. First, the BTG established how it detects the enemy action and answers Priority Intelligence Requirements (PIR). For example, the scout platoon leader may say, “OP 1 observes that movement through the Whale Gap, NAI 5, and reports via JCR on the TF Battle S2 chat.” Then, the S2 may say, “That answers PIR #1. We now know the main avenue of approach.”
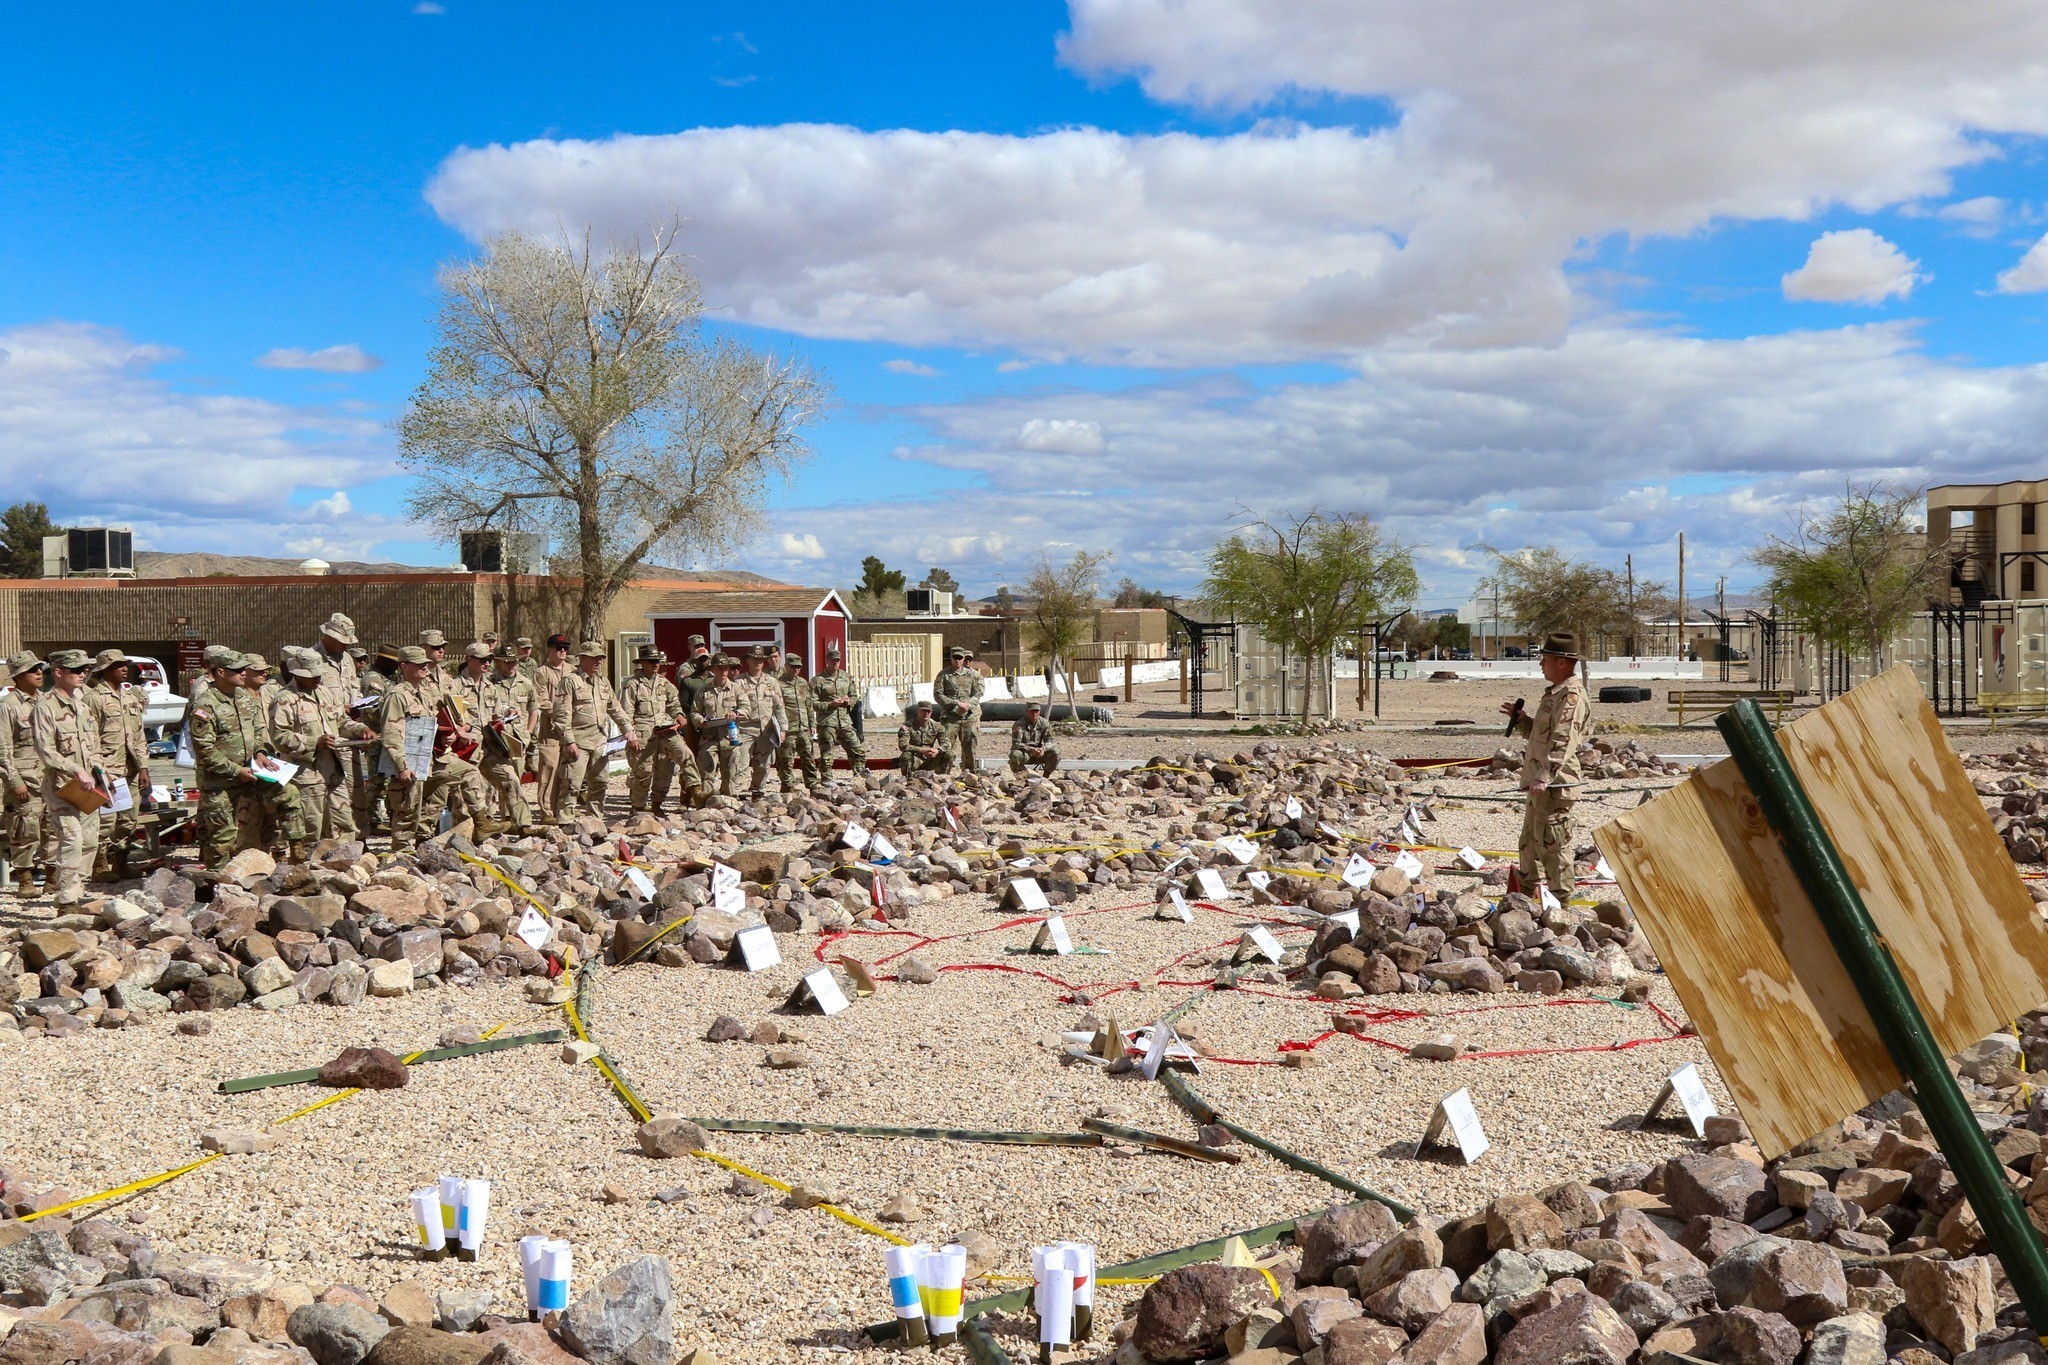
Figure 2. 11th ACR conducting a combined arms rehearsal prior to deployment.
Next in the sequence is the fires fight. The FSO might say, “That triggers me to fire target AB1001 which is a Battery 6 fired from Alpha Battery with the task to disrupt the formation as it moves through the Whale Gap.” The JTAC would discuss any response from fixed wing aircraft and the brigade aviation officer or liaison from the aviation element would then discuss and rotary wing response. The S2 may also discuss armed drones if available. Of course, this is only if fixed wing, rotary wing, or armed drones are to be used in this engagement. Rather than go around the horn and having staff officers and leaders brief “no change”, only those units or assets contribute to the portion of the fight in question chime in.
Following this, the various protection elements talk. For example, and engineer battalion commander may say, “As the element approaches the John Wayne Foothills, it will come in contact with a 500 m antitank ditch located at MP 3214 5969.” The ADA officer would discuss arrayal of assets in the event the enemy is expected to employ aviation. Then, the Electronic Warfare (EW) officer would discuss any jamming or other effects arrayed against this threat. For example, “As the enemy battalion exits the Whale Gap they will encounter GPS jamming until 0200.” All of this occurs only if any of these elements have a role in the portion of the fight being rehearsed.

Figure 3. Task force Battle Command (U.S. Army)
Maneuver comes last after the BTG and its enablers have shaped the fight. The Mechanized Infantry Battalion (MIBN) commander or the commander of the Mechanized Infantry Company (MIC) arrayed at John Wayne Foothills may discuss their direct fire plan. Keep in mind that all this is occurring on the map or terrain model. Commanders and staff orders move about the map; they do not sit back in chairs and brief. The very best CARs the BTG has executed ended up with commanders fighting and coordinating actions on the map with little prompt from the BTG commander or S3. At the end of this exchange, the S-2 assesses the enemy’s effect on combat power and the unit’s effect on the enemy. “I (S-2 as the enemy) believe you have lost one MIC and I lost a company of infantry and a platoon of tanks.”
When in the defense, it may be helpful for a commander to brief their engagement area development when discussing their establishment, though this can take away from the flow. If inclined, an example is: “I assess the enemy will uses AoA 1 and 2. I assess the enemy will send two battalions along AoA 1, with one attempting to breach, and the other as the exploitation force. I intend to kill the enemy in Engagement Area Crush. I will emplace a turn obstacle from MP 1234 5678 to MP 1265 5690. I will have one company arrayed in a Battle Position 1, another in Battle Position 2, and a third in an alternate BP [which the commander points out on the map or terrain model]. I have planned Target AB 1010 to destroy enemy moving along Route Eagles.” Commanders should brief their engagement criteria, disengagement criteria, and displacement criteria, with the final one including an assessment of time to displace and reestablish.
In the offense, it is helpful for the commander to brief their transition from movement to maneuver at the probable line of contact. “I will SP from Attack Position Fury at 0200 traveling along Axis of Advance Blue. An advanced guard will lead with companies in column. We anticipate the PLOC being PL California. 500 m from PL California, elements will transition to platoons in wedge and transition to traveling overwatch…”
The commander’s role during the fighting portion of the CAR is to ask questions, such as “How long will it take?” and to make decisions that pop up during synchronization. Additionally, the commander verifies that subordinate commanders have nested their scheme of maneuver with his or hers. The S3 with assistance from the FSO and S2 help the commander ensure his or her fighting products are nested across the board.
A sample script to focus on fighting versus briefing is as follows:
- Rules (S3)
- Orientation to the Terrain Board (AS3)
- Commander’s Intent and Visualization (CDR) (see next section)
- Initial Set
- Enemy (S-2): Battalions (including slant), PAAs, C2, FARPs, other HPTL targets, obstacles (offense)
- Friendly (AS3): BNs (including slant), Scouts, Obstacles (defense), C2.
[Note: We find that having the AS3 brief all friendly sets significantly reduces time on the front end of the CAR and prevents the CAR from turning into a back brief.]
- Fight the Plan
- When on Defense:
- Enemy Action Briefed by S-2 or AS2: “I am LTC John Smith in commander 1-1 IN BN. I have 2 mechanized IN companies and 1 tank company. I will move along Route Eagles…”
- Who sees it? (UAS, recon aviation, scouts, etc.): “I observe four tanks entering EA Smash and report to Brigade S-2 on channel 509, the command net.” [All proponents able to sense or observe this action explain how they detect and how they report.]
- PIR Answered, if any. (S-2)
- Fires Response:
- Artillery (FSO): What targets are being fired and are there any triggers for special munitions?
- Aviation (as appropriate):
- Fixed Wing (JTAC)
- Rotary Wing (BAO)
- Armed UAS (S-2)
- Protection:
- Obstacles (TF Engineer or BEB commander): Where are the obstacles and what are their effects on the enemy?
- ADA (Protection officer): Where is the ADA and what is its engagement and disengagement criteria?
- EW (EW): What assets will be in support at this time and what are their effects?
- Maneuver: What is the ground commander doing to counteract the enemy? The commander should also brief triggers to occupy BPs and use internal fire support measures, such as mortars, as well as engagement criteria, disengagement criteria, and displacement criteria. [Commander’s should discuss risk as they see it.]
- S2 adjudication: Following this action, the S2 should assess what Red and Blue forces have been destroyed or degraded and this should be kept in mind as the rehearsal progresses.
- When on Offense:
- Intel read: How do we identify the enemy disposition, composition, strength, and COA? What assets detect this? How do we report information?
- UAS
- Aviation
- Scouts
- Other intel sources
- Fires actions to shape the enemy.
- Aviation actions to shape the enemy.
- Fixed Wing
- Rotary Wing
- UAS
- Maneuver
- Actions at the PLOC, formation, order of movement.
- Engineer efforts
- Smoke
- SOSRA as necessary.
- Maneuver plan 1 level down.
- Risk.
- Enemy response (S-2)
- S2 adjudication: Following this action, the S-2 should assess what Red and Blue forces have been destroyed or degraded and this should be kept in mind as the rehearsal progresses.
- Decision Points (S-3): A note taker should track along the Decision Support Tool and announce when the unit has reached a decision point and the S3 should recommend a decision to the commander.
Steps 5 and 6 above will repeat as many times as the commander and S-3 feel necessary. Generally, the commander and S-3 agree upon what they will rehearse and assign each a turn. This may look like: counter-recon fight, fight in engagement area 1, fight in engagement area 2, and counterattack, as an example.
The methodology of the CAR laid out here ensures that commanders and staff officers are rehearsing actions on the terrain model or map rather than back briefing their plans and helps ensure efforts are synchronized in time, space, and purpose. Setting the scene for the CAR is the commander’s visualization and the method offered here has proven quite effective. Taken together, these techniques represent a great way to ensure operational success.
LTC Darrell Fawley is a Defense planner, Defense Planning and Capabilities Branch, International Military Staff, NATO, Brussels, Belgium. His previous assignments include commander, 2nd Squadron, 11th Armored Cavalry Regiment, Fort Irwin, CA; professor of military science, Ohio University Army Reserve Officer Training Corps (ROTC), Athens, OH; executive officer, 2nd Brigade Combat Team, 3rd Infantry Division, Fort Stewart, GA; and executive officer, 3rd Battalion, 67th Armored Regiment, Fort Stewart. LTC Fawley’s military schools include the U.S. Army Ranger Course, Airborne Course, Air Assault Course, Reconnaissance and Surveillance Leaders Course, Sniper Employment Leaders Course, Heavy Weapons Leader Course, Bradley Leaders Course, Combatives Level 1 and II, and the Combat Lifesavers Course. He has bachelor of science degree (major: Arabic and Spanish) from the U.S. Military Academy. LTC Fawley also holds a master of public administration degree (MPA) and a master of social science degree from Ohio University. He also holds master in military art and science degrees in “Art of War” and “Theater Operations” from the U.S. Army Command and General Staff College, Fort Leavenworth, KS. LTC Fawley’s awards and badges include Meritorious Service Medal with four oak leaf clusters, the Expert Infantryman Badge, and the Combat Infantry Badge. He has authored one book, 4-31 Infantry in Iraq’s Triangle of Death (McFarland, 2019).
Social Sharing